


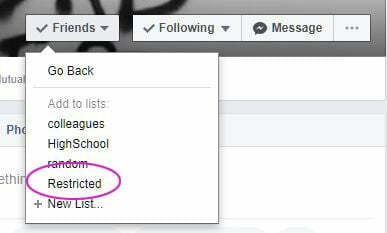
Contents
How to Make Facebook Frames

To create a Facebook frame, you need to be able to use an image editor, such as Adobe Illustrator or Photoshop. You can download a free version from Adobe or download built-in software from Microsoft and Apple with the latest operating systems. Browser-based alternatives to Adobe Illustrator can also be downloaded. Once you have created your frame, save it as a PNG file and follow Facebook guidelines. Next, upload it to Frame Studio and configure it as needed.
Canva
To create your own Facebook frame, you’ll first need to open an image in Canva. You can also upload an image from your computer. Once you’ve uploaded your photo, go to the Elements tab. Read also : Is Facebook Portal Discontinued?. From here, click “Borders” and type “frame” to find hundreds of frames to choose from. Once you’ve found one, click it and drag it into place on your design. You can then edit the frame just like you would any other image.
Once you’ve created your frame, you can easily share it with your friends. You can also toggle it on and off, duplicate it, and preview on mobile. You can edit the size of your frame, too. You can add photos, videos, and patterns. And if you’re feeling particularly creative, you can even add your own text and upload a custom logo or pattern. But you can only upload a photo once, so remember to save your work after you’ve created your frame!

Facebook’s Camera Effects Platform
If you want to create a custom Frame for your Facebook post, first you’ll need an image editor. You can use Adobe Photoshop or Adobe Illustrator, both of which offer industry-leading image editing software. This may interest you : How to Make Posts Shareable on Facebook. Both Microsoft and Apple offer free browser-based versions. Once you’ve created your image, save it as a PNG, meet Facebook’s requirements, and upload it to the Frame Studio.
Next, open Facebook Camera Effects and select the Frame Studio feature. This feature enables you to create custom Facebook frames and then share them with friends. You can also create custom Facebook Event and Location frames. Facebook frames allow you to add text or design overlays to your image, much like Snapchat filters. They are a great way to display your creativity while enhancing your pictures. You can also customize the size and color of each element and upload it to Facebook.
After you’ve created your Facebook frame, you can’t change it once it’s uploaded. You must have the approval of Facebook before publishing it, and your submission may take up to a week to be approved. You can also include links to websites outside of Facebook and photos of fictional people. If your frame is suitable for viewers aged 13 and over, it’s OK. Sexually suggestive imagery is forbidden.
Profile picture frames
If you want to add frames to your profile pictures but don’t know how to do so, then this guide is for you. Facebook has a feature called Frame Studio that lets you create your own frames on the website. You can also create your own by using your own picture or image and then uploading it to Facebook. Read also : Why Facebook Has Locked My Account?. To get started, simply go to the Frame Studio website and follow the instructions provided. You can even make a frame of your profile picture and share it with your friends.
Once you have uploaded your image, you can begin the process of making your own frames on Facebook. First, you must create a page or a group. You can create a Facebook Page if you have a Facebook business page. To get started, log in to your account and click “Add a Frame.” Then, simply select the frame that you want to upload and add a description to it.

Uploading your own frame
You can create and upload your own Facebook Frames. You can also add tags and keywords. Then, schedule when to publish your frame. Once it’s approved, your friends and followers will be able to see it right away. This is especially useful for temporary campaigns. You can also select to only display your Frames within your locality. Pages with locations will automatically appear in this list of options. To create a Facebook Frame, you must have an account.
Once you have an account on Facebook, you can start creating your own Frames. You can upload them to your profile photo and make sure to name them properly. You can use keywords to make your Frames more visible to people on the Facebook platform. For your Frames, you should create a background that’s transparent. Don’t make the frame too dominant, as this may violate Facebook’s guidelines. Using a frame that’s dominant can be counterproductive.


