


Contents
What Are the Best Export Settings for Instagram?

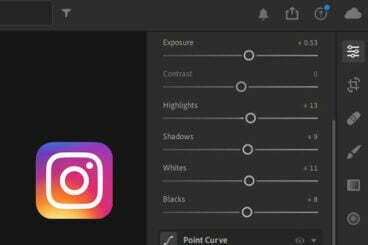
If you want to export your photos to other websites, you should know the best export settings for Instagram. Usually, you should export your images with a higher resolution because the higher the quality, the larger the file size. When you export your images, Instagram runs the image through an algorithm. Some people say exporting at 100% or 76% is better, but you can experiment with different export settings until you find one that works best for you.
File format
When importing videos into your Instagram account, you need to know the file format that will work best for the platform. While most video editing programs automatically apply certain video export settings, it’s not always possible to change them. On the same subject : Is 1000 Followers on Instagram Enough to Get Sponsored?. To do this, you need to use an audio platform or video editing software that allows you to change the settings. Once you’ve made the necessary adjustments, you can export your videos to the appropriate format for Instagram.
Although Instagram doesn’t limit the file size that you can export, it still requires that you set the resolution to be compatible with your device. Click on the “Width & Height” option, and then select 1080p for the longest edge of your image. If your photo is in portrait orientation, leave the width space blank, and fill in the 1080 heights space with the right amount of pixels. The opposite is true for landscape orientation.
Aspect ratio
When exporting images for Instagram, the aspect ratio is critical to ensure your photos will be sharp and crisp. The best aspect ratio is 4:5. Portrait photos should be oriented horizontally, while landscape images should be oriented vertically. See the article : How to Download Video From Instagram. If you are unsure of which aspect ratio to choose, try doubling the size of the picture. The default aspect ratio for Instagram is 72 ppi, but you can experiment with other values, such as 4:3.
In the Develop module, tap on “Options” and select “Export.” Then, choose a setting that suits your needs the best. Choose an aspect ratio that allows you to capture the most of the screen space. Then, export the image using a method that doesn’t compress the file. Apple users might prefer AirDrop, while others might want to use Dropbox or Google Drive. You can also use scheduling apps.

File size
If you’re wondering what file size to choose when exporting Instagram pictures, you’re not alone. Many people complain that their images are too large, but Instagram’s algorithm does its best to compress images with the minimum loss of quality. See the article : What Happens When You Restrict Someone on Instagram?. When exporting an Instagram image, you can choose to export it in JPEG or PNG format. Both formats will produce the same file size, but choosing a higher quality setting will result in a higher file size.
Before exporting your Instagram videos, make sure that they are the correct format for your device. Instagram’s video format requires that your image is square and under 2GB in size. Choosing the right codec is also important, as H.264 is a high-quality codec for most devices. If you’re not sure, check out the YouTube video guide to learn more about the best codec for exporting Instagram.

Metadata
Using Lightroom, you can export your Instagram photos to another platform with just one click. To export your photos to Instagram, you need to select “Publish” and then choose “Metadata”. There are several settings you can choose for your exported files, including the hashtags and caption. Once your images are exported, you can use them to create captions on Instagram and share them with others. To post to Instagram, you can also use the LR/Instagram plugin.
Besides, you can export your images from Instagram in high-quality. High-quality images will drive more engagement to your account. But it’s hard to upload them one by one. AiSchedul is a handy tool that can transfer your images from your computer to your phone in just a few clicks. Here are some of its features. We’ve listed some of them below:
Sharpening
If you are trying to upload your photographs to Instagram, you may have noticed that the photos are not as sharp as they could be. This is due to the compression algorithms used by the service, and sharpening is necessary for quality images. There are ways to sharpen an image on Instagram while avoiding the problems that come with over-sharpening. Read on to discover a few methods for sharpening your images.
First, you must make sure that your photos have sharpening enabled. You can do this by selecting the “Output sharpening” option. This option is available on the export window. Once you click on this button, you should notice an arrow pointing to the image in the export window. If you are using a different application, you should select the “Original” option instead. After that, you can adjust the settings until you find the right one for your image.
Metadata for Instagram images
Adding metadata to your Instagram images is relatively easy. Once you have uploaded the images, you will have to decide what type of information you want to include. Typically, the camera information is retained. If you do want to add more information, consider adding a description, the author, and the origin. If you want to remove certain metadata, you can always edit them in the Info panel. It is best to choose a format that focuses on a specific kind of metadata, since the rest is a waste of space.
When exporting Instagram images, make sure you select the “Screen” option. Then, select “High” as the Amount. It is recommended that you select this option for Instagram images because they have more metadata. These metadata include EXIF data, copyrights, and contact details. If you choose to include all this information, you will end up with a much larger file. Additionally, adding metadata doesn’t add value to the image.


