


Contents
How to Make Facebook Groups Work For You

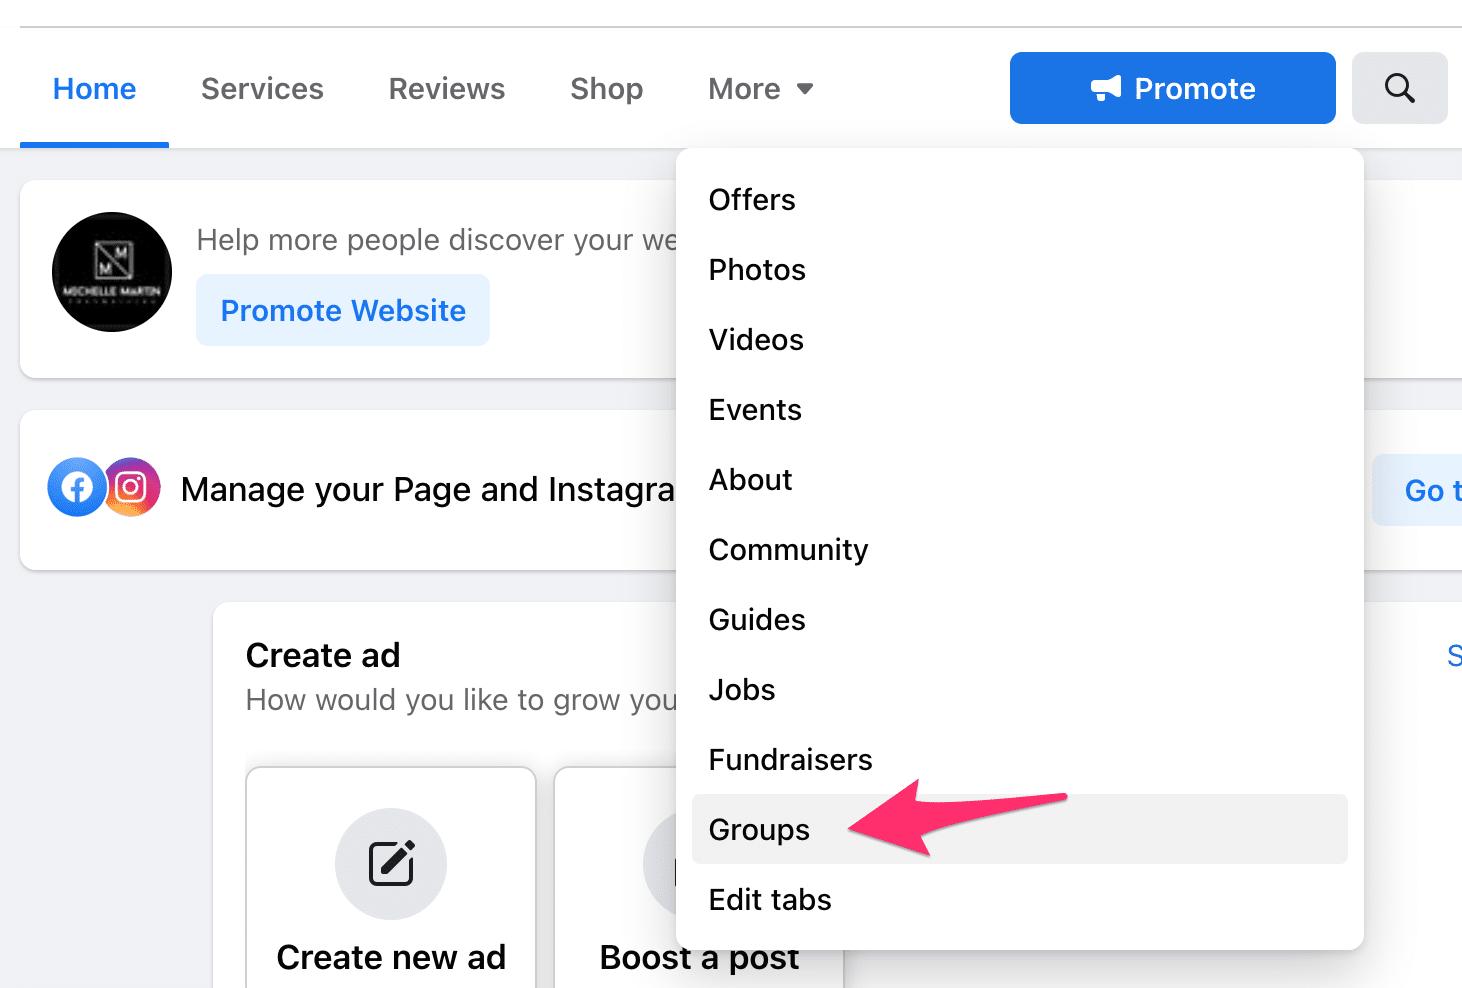
So you’ve decided to create your own Facebook group. How do you go about doing that? First, create a personal profile in Facebook and then click “Groups”. From there, you’ll have many options. You can also change the privacy settings of a group and add a Moderator. Another option is to schedule posts in a group. Those two options will be discussed in this article. If you’re still unsure about which one to choose, check out our helpful guide below.
Create a Facebook group with your personal profile
Once you’ve created your Facebook group, you can invite friends from the settings screen, although you may want to wait until you’ve fully configured the group before you do that. In addition to adding a unique name for your group, you can also create a short group description for non-members to read. On the same subject : How to Change Facebook Language. Include a brand name in the description, which you can find under the settings tab. It may seem silly, but this is an effective strategy for building a group much faster.
The next step is to invite existing members to join the group. Invite your friends by posting links to your profile in the group’s settings page. Once you’ve invited them, you can use their Facebook groups as a marketing tool. To make this approach more effective, use an Instagram group logo and cover image. You can also post a Facebook group link to your profile, which people can tap on. Moreover, you can use photos of yourself and your friends to share stories.

Change a private group’s privacy setting
Is it possible to change the privacy settings of a private Facebook group? The answer to this question depends on the type of group and the amount of members. Facebook allows groups that have fewer than five thousand members to change their privacy setting once every 28 days. To see also : How to Delete Profile Picture in Facebook. After that, however, the privacy setting of the group will remain unchanged. If you want to make your group visible to the public, you must first change the privacy settings of the group.
In order to change the privacy settings of a private Facebook group, you must first know how to find it. Go to the group homepage. From there, click More. Select View group info. On the next page, click Change Privacy. This will open up a new menu that will let you change the settings. Make sure you have selected the appropriate privacy setting before changing it. The change will take effect momentarily.
Add a Moderator
If you’re wondering how to add a Moderator to a Facebook community group, you’ve come to the right place. Moderators are required to respond to posts in a timely manner and to keep the group content relevant to its members. Their duties also include increasing the number of contestants in tournaments and other events and posting new content on a regular basis. Read also : Facebook Reactions – A Closer Look. These tasks may seem daunting to manage, but moderators need to be passionate about the community and be trustworthy. Without this, you may be unable to manage the group effectively.
Adding a Moderator is a simple process, and the process is simple. Once the group is created, log into the Facebook app and select the “Add Moderator” option from the menu on the left. Click the “Add Moderator” button and follow the on-screen instructions to create the position. Moderators will then have admin privileges and will be able to change any group settings, including the name, cover photo, linked pages, and privacy settings.

Schedule posts in a Facebook group
You can easily schedule posts in a Facebook group by using 3rd party apps. These tools act as if you posted content to the group yourself. One of the most popular scheduling apps is ContentStudio, which allows individuals to publish niche-relevant content to Facebook groups. The tool features a great content scheduler. Let’s take a closer look at how to schedule posts in a Facebook group.
If you have a Facebook group, you can schedule posts so that they are published when you’re most likely to be online. First, log in to your group. Next, tap ‘Schedule posts’. After scheduling your posts, you can edit them as needed. It’s free to schedule posts in a Facebook group. To learn how to schedule posts in a group, keep reading! This tool will help you stay on top of your content.
Customize a Facebook group’s cover photo
If you’re trying to draw more attention to your group’s page, consider using a GIF on its cover photo. You can create a GIF with Giphy Capture, and then upload it to your group’s cover page. Facebook thumbnails are squares with round corners. While some of them grab the center of the image, others are less obvious. Regardless of what you decide to do with your cover page, remember to be genuine. The cover photo will be seen by the public, and you want to attract as many people as possible while keeping your current followers interested.
The cover photo is one of the first things potential new members will see when searching for your group on Facebook. It should be big enough to display on mobile devices and include a brand logo. Don’t forget to leave a little space for other design elements. Make sure your cover photo has at least a few lines of whitespace between the various elements. Using whitespace effectively will help to keep your group looking good.


